BLOGS

The Ultimate Guide to Installing Drywall in New Construction
"Installing drywall in new construction transforms a space from bare bones to beautiful walls, laying the foundation for a home that’s both functional and full of potential."
Installing drywall in new construction is a crucial step in turning a bare framework into a livable, functional space. Drywall not only creates the walls and ceilings we see every day but also provides structural support, insulation, and fire resistance. If you’re embarking on a new construction project, knowing how to install drywall efficiently can save you time and money while ensuring a professional finish.
In this comprehensive guide, we’ll walk you through every stage of drywall installation, from preparing the space to finishing touches. Whether you’re a seasoned DIYer or a first-time builder, this guide will help you achieve a high-quality result.
Step 1: Prepare the Area
Before starting drywall installation, preparation is key. Proper preparation ensures the drywall will be securely installed and makes the process smoother.
1.1. Check the Framing
Ensure that the studs and framing are level and square. Drywall sheets will only attach properly if the framing is in good condition. Any irregularities should be fixed before proceeding.
1.2. Install Insulation (If Applicable)
If your construction plan includes insulation in the walls or ceiling, this is the time to install it. Place fiberglass, foam, or cellulose insulation between the studs for improved energy efficiency.
1.3. Mark Stud Locations
Use a stud finder to mark the locations of the studs along the walls and ceiling. This will guide you when securing the drywall sheets.
1.4. Prepare Tools and Materials
Make sure you have all the necessary tools and materials ready. This includes drywall sheets, screws, joint compound, drywall tape, and finishing tools. Having everything on hand before you start will help avoid interruptions.

Step 2: Cut and Hang Drywall
Now that your space is prepped, it’s time to cut and hang the drywall.
2.1. Measure and Cut the Drywall
Start by measuring the height and width of your walls or ceiling. Use a utility knife to cut drywall sheets to the required size. Drywall can be scored easily with a knife, then snapped along the line for a clean break. When cutting drywall for corners, allow a slight overlap to ensure a seamless fit.
2.2. Hang the Drywall on the Walls
Begin hanging drywall on the ceiling if applicable. It’s easier to hang ceiling drywall before wall drywall because it supports the weight of the sheets. Start with the longest wall, and attach drywall sheets vertically or horizontally depending on your preferences and the size of the space.
Tip: Drywall sheets should be attached with the long edge perpendicular to the studs, and screws should be spaced about 16 inches apart along the studs.
2.3. Hang Drywall on the Ceiling
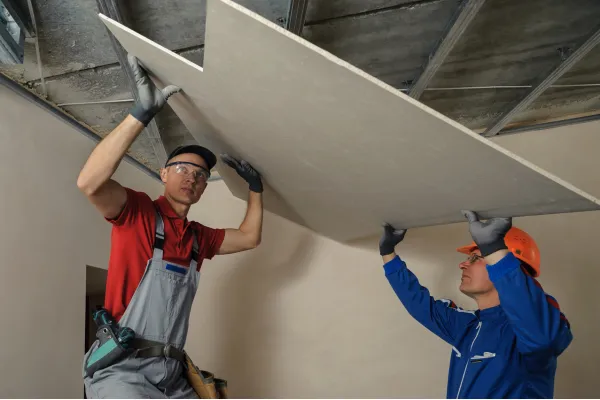
For ceilings, it’s best to work with a partner, as drywall sheets are heavy. Position the sheet on the ceiling and secure it to the joists using drywall screws or nails. If you’re working alone, consider using drywall lifts to assist with holding the panels in place.
2.4. Leave Expansion Gaps
Leave a small gap between the drywall and the floor to allow for expansion and contraction. This also helps prevent water damage if the floor gets wet.
Step 3: Secure the Drywall
Once the drywall is positioned, it needs to be securely fastened.
3.1. Use Drywall Screws or Nails
Use drywall screws to secure the sheets to the studs or joists. Screws are preferred over nails as they provide a more secure hold. Insert the screws about 1/2 inch from the edge of the drywall, ensuring they don’t break through the surface of the drywall.
3.2. Fasten the Edges
Start at the edges of the drywall and work your way toward the center to ensure the sheets are firmly secured. Leave a small indentation (about 1/16 inch) with the screw to make it easier to apply joint compound later.
3.3. Install Drywall in Corners
For corners, use either drywall corner bead or pre-formed drywall strips to create a clean, sharp finish. This will give the corners added strength and prevent damage later.
Step 4: Tape and Mud the Seams
Once the drywall is installed, the next step is to tape and mud the seams to create a smooth, seamless surface.
4.1. Apply Joint Compound
Spread a thin layer of joint compound (also known as mud) over the seams using a drywall knife. The mud should be applied to the seams between the sheets of drywall and over the screws.
4.2. Apply Drywall Tape
Place drywall tape (paper or fiberglass mesh) over the mudded seams. Paper tape is more commonly used in new construction, while mesh tape can be used for quicker applications. Press the tape firmly into the mud to ensure it sticks.
4.3. Apply Additional Layers of Mud
After the tape is applied, use a drywall knife to cover it with another layer of joint compound. Be sure to feather the edges to make the seams as smooth as possible. Allow each coat of mud to dry thoroughly (usually 24 hours) before sanding.
4.4. Sand Between Coats
Once the mud is dry, lightly sand it with a fine-grit sanding block to smooth out any bumps. Wipe away any dust with a damp cloth and apply a second coat of joint compound.
4.5. Repeat the Process
Repeat the taping, mudding, and sanding process 2-3 times to create a smooth surface. The final coat should be thin and as smooth as possible, with all seams and screw holes fully covered.
Step 5: Finish the Drywall
With the seams mudded and smooth, it’s time to finish the drywall with primer and paint.
5.1. Apply a Primer
Before painting, apply a coat of drywall primer to seal the surface. Primer ensures that the paint adheres properly and creates a more even finish.
5.2. Sand the Surface Again
Once the primer is dry, give the surface a final light sanding to remove any imperfections.
5.3. Paint the Walls
Now you’re ready to paint! Choose a high-quality interior paint and apply it evenly over the walls or ceiling. Depending on the color and type of paint, you may need 2-3 coats for full coverage.
5.4. Install Trim and Moldings
Once the paint is dry, you can install trim and moldings, such as baseboards and crown molding, to give your space a polished look.
Step 6: Clean Up
After the drywall is fully installed, it’s important to clean up the work area. Dispose of scrap drywall, old joint compound, and dust. Clean your tools and store them properly for future use.
Final Thoughts
Installing drywall in new construction may seem like a daunting task, but with the right tools and technique, it can be completed efficiently and effectively. Whether you're working on a small room or an entire house, following this step-by-step guide will help you create a smooth, professional-looking finish that will stand the test of time.
By preparing your space, taking care during installation, and finishing the drywall with care, you’ll have a home that’s ready for paint, furniture, and the finishing touches that make it truly your own. Happy building!

