Water Damage Repair Experts
Drywall, Water Repair, and Ceiling Solutions
Ensuring your spaces are expertly finished, from drywall installation for water damages to ceiling repairs. Trust our skilled team to deliver precise and reliable services for all your drywall and water damage restoration needs.
ABOUT US
25+ Years of Expertise in Ceilings and Walls Restoration
At Drywall & Restoration LLC, we specialize in drywall water damage repair and ceiling services. With 25 years of experience, we ensure that every project is handled with care and precision. Our valid license, held for the past 20 years, underscores our commitment to professionalism and industry compliance.
Proven Expertise
Customer Satisfaction
Skilled Professionals
Professional Engineers Provide
Ready to Transform Your Space?
Ready to Transform Your Space?
Delivering High Quality Water Damage Repair & Ceiling Services

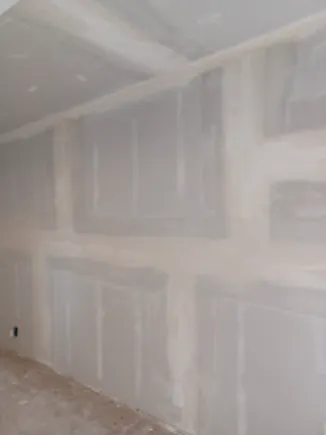
DRYWALL INSTALLATION
Our drywall installation service ensures a solid, smooth foundation for your walls. Whether for new construction or renovation, we guarantee high-quality results.
Smooth Installation
Reliable Craftsmanship
Lasting Durability

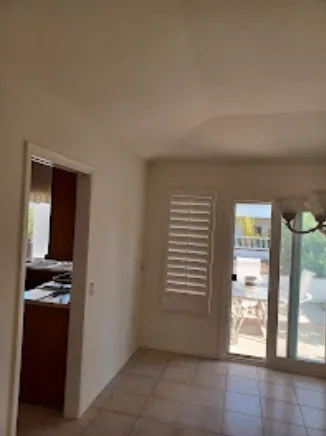
CEILINGS & WALLS
Transform your space with our expert ceilings and walls services. Fresh finishes, flawless installation—elevate your home today!
Flawless Finish
Premium Paints
Professional Application
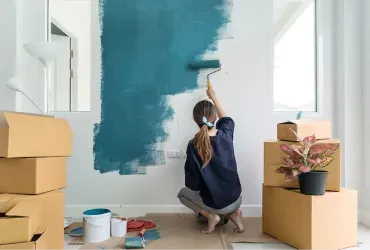
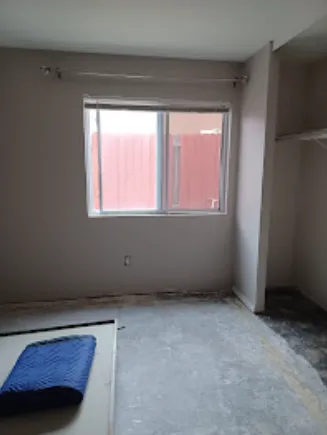
ROOM PAINTING
Transform your interiors with our meticulous room painting services. We handle everything from preparation to the final coat, delivering beautiful, even color every time.
Beautiful Colors
Beautiful Colors
Detail-Oriented

POPCORN REMOVAL
Update your home’s look by removing outdated popcorn ceilings. Our team efficiently removes the texture and finishes with a smooth, modern ceiling.
Modernize Your Space
Efficient Removal
Smooth Ceilings
Delivering High Quality Water Damage Repair & Ceiling Services
DRYWALL INSTALLATION
Our drywall installation service ensures a solid, smooth foundation for your walls. Whether for new construction or renovation, we guarantee high-quality results.
Smooth Installation
Reliable Craftsmanship
Lasting Durability
CEILINGS & WALLS
Transform your space with our expert ceilings and walls services. Fresh finishes, flawless installation—elevate your home today!
Flawless Finish
Premium Paints
Professional Application
ROOM PAINTING
Transform your interiors with our meticulous room painting services. We handle everything from preparation to the final coat, delivering beautiful, even color every time.
Beautiful Colors
Beautiful Colors
Detail-Oriented
POPCORN REMOVAL
Update your home’s look by removing outdated popcorn ceilings. Our team efficiently removes the texture and finishes with a smooth, modern ceiling.
Modernize Your Space
Efficient Removal
Smooth Ceilings

WHY CHOOSE US
Your Trusted Partner in Ceilings and Walls Repair Services
At Drywall & Restoration LLC, we pride ourselves on delivering exceptional quality and service. Here are a few reasons why our clients choose us.

PREMIUM MATERIALS

CEILING WARRANTY

SKILLED EXPERTS

AWARD WINNING
WHY CHOOSE US
Your Trusted Partner in Ceilings and Walls Repair Services
At Drywall & Restoration LLC, we pride ourselves on delivering exceptional quality and service. Here are a few reasons why our clients choose us.
PREMIUM MATERIALS
CEILING WARRANTY
SKILLED EXPERTS
AWARD WINNING
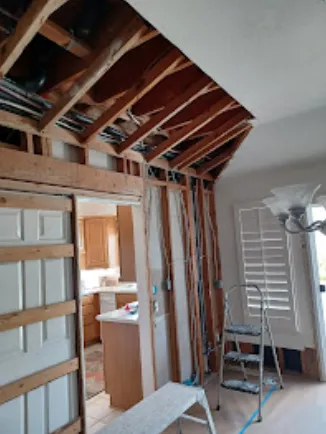
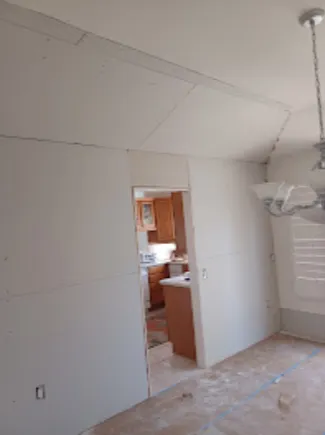
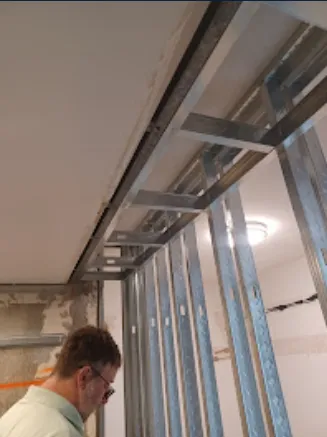
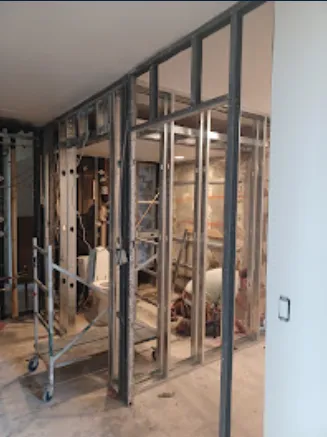
WHY CHOOSE US
Our Latest Projects
WHY CHOOSE US
Our Latest Projects
FAQ
Frequently Asked Questions?
What types of drywall services do you offer?
We provide a wide range of drywall services including installation, repair, patching, sanding, and taping & mudding. Our team can handle projects of all sizes, from small repairs to full-scale installations.
Do you offer ceiling services?
Yes, we specialize in both ceiling drywall installation and ceiling painting. Whether you need a new ceiling installed or an existing one repaired and painted, we have you covered.
How long does a typical drywall installation take?
The duration of a drywall installation project depends on the size and scope of the work. For most residential projects, we can complete the job within a few days. We always provide a detailed timeline before starting any work.
Do you offer a warranty on your services?
Yes, we offer a satisfaction guarantee on all our services. We also provide a warranty for our work to ensure you have peace of mind after the job is completed.
How do you ensure the quality of your work?
We use only premium materials and adhere to strict guidelines and processes to ensure high-quality results. Our team of skilled professionals is committed to delivering excellence in every project.

Blogs
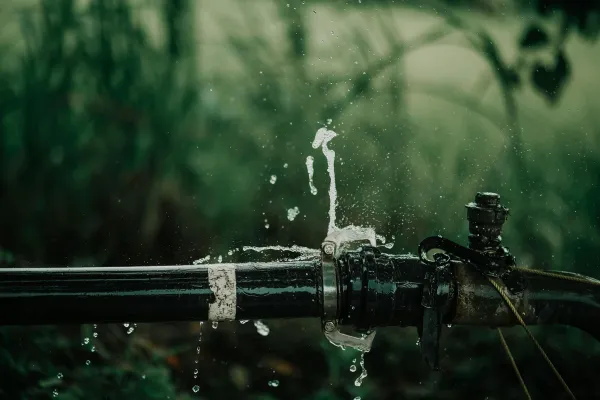
How to Handle Drywall Repair After a Plumbing Leak
"Fixing drywall after a plumbing leak is about patience—stop the leak, dry the area, and restore your space with care."
Dealing with a plumbing leak can be a frustrating experience, especially when it leaves behind damaged drywall. However, with the right tools and approach, repairing the drywall after a plumbing leak doesn’t have to be a daunting task. This step-by-step guide will walk you through the process, from assessing the damage to completing the repair.
1. Address the Plumbing Leak First
Before you can even think about repairing the drywall, the first step is to ensure the plumbing issue is fixed. A leaking pipe is the root cause of the damage, so it's crucial to address the leak immediately. If you're not familiar with plumbing repairs, it’s advisable to call a professional plumber to stop the leak and prevent further water damage.

2. Assess the Extent of the Damage
Once the leak is fixed, assess the damage to the drywall. Look for signs of wet or soft spots, visible stains, or mold. If the drywall is just damp but hasn't broken apart, you may be able to dry it out with fans and heaters. If the drywall has crumbled or is significantly soaked, it will need to be replaced.
3. Remove Damaged Drywall
Using a utility knife or a drywall saw, carefully cut out the damaged sections of drywall. Cut along the seams or studs to make the repair more manageable. Be sure to remove any insulation that has become wet, as it can trap moisture and promote mold growth. Dispose of the damaged drywall properly.
4. Inspect and Dry the Area
Before installing new drywall, ensure that the area is completely dry. Use fans, dehumidifiers, or even a heat gun to speed up the drying process. Check the studs and the surrounding area to ensure they are dry and free from mold or mildew. If you notice mold, treat the area with a mold-killing solution to prevent future growth.
5. Install New Drywall
Cut a new piece of drywall to fit the hole left by the damaged drywall. Position it over the studs, ensuring a snug fit. Use drywall screws to attach the new drywall to the studs. Be sure to leave a small gap between the drywall and the floor to prevent future water damage.
6. Tape and Mud the Seams
Once the new drywall is in place, tape the seams with drywall tape. Then, apply a layer of drywall joint compound (also known as mud) over the seams and screws. Use a drywall knife to smooth out the compound, and allow it to dry completely. You may need to apply several coats of compound, allowing each layer to dry before adding the next one.
7. Sand the Surface
After the joint compound has dried, use a sanding block or drywall sander to smooth the surface. Be sure to sand the compound until it’s level with the surrounding wall, with no visible ridges or bumps. Clean up the dust thoroughly before moving on to the next step.
8. Prime and Paint the Drywall
Once the surface is smooth, apply a coat of primer to the new drywall. Primer helps seal the surface and ensures that the paint adheres properly. After the primer dries, paint the wall to match the rest of the room. You may need to apply two coats of paint for a uniform finish.
9. Inspect for Leaks Again
Before calling the job complete, double-check the area around the repaired drywall for any signs of leaks. It’s always better to catch a problem early rather than have to redo the repair.
10. Prevent Future Leaks
After completing the drywall repair, take preventative measures to avoid future plumbing leaks. Regularly inspect your plumbing for signs of wear and tear, and ensure that your home’s water pressure is properly regulated to prevent pipes from bursting.
Final Thoughts
Handling drywall repair after a plumbing leak can be manageable if you follow the right steps. By addressing the leak first, thoroughly drying the area, and taking care during the repair process, your drywall can be restored to its original condition. If you're unsure about any part of the process, don’t hesitate to consult with a professional handyman or contractor for help.